


This week 4th grade will start their fall birch tree painting! We create these by using....
Materials:
12x18 90lb paper
little pieces of cardboard
and tempera cakes for the leaves and grass

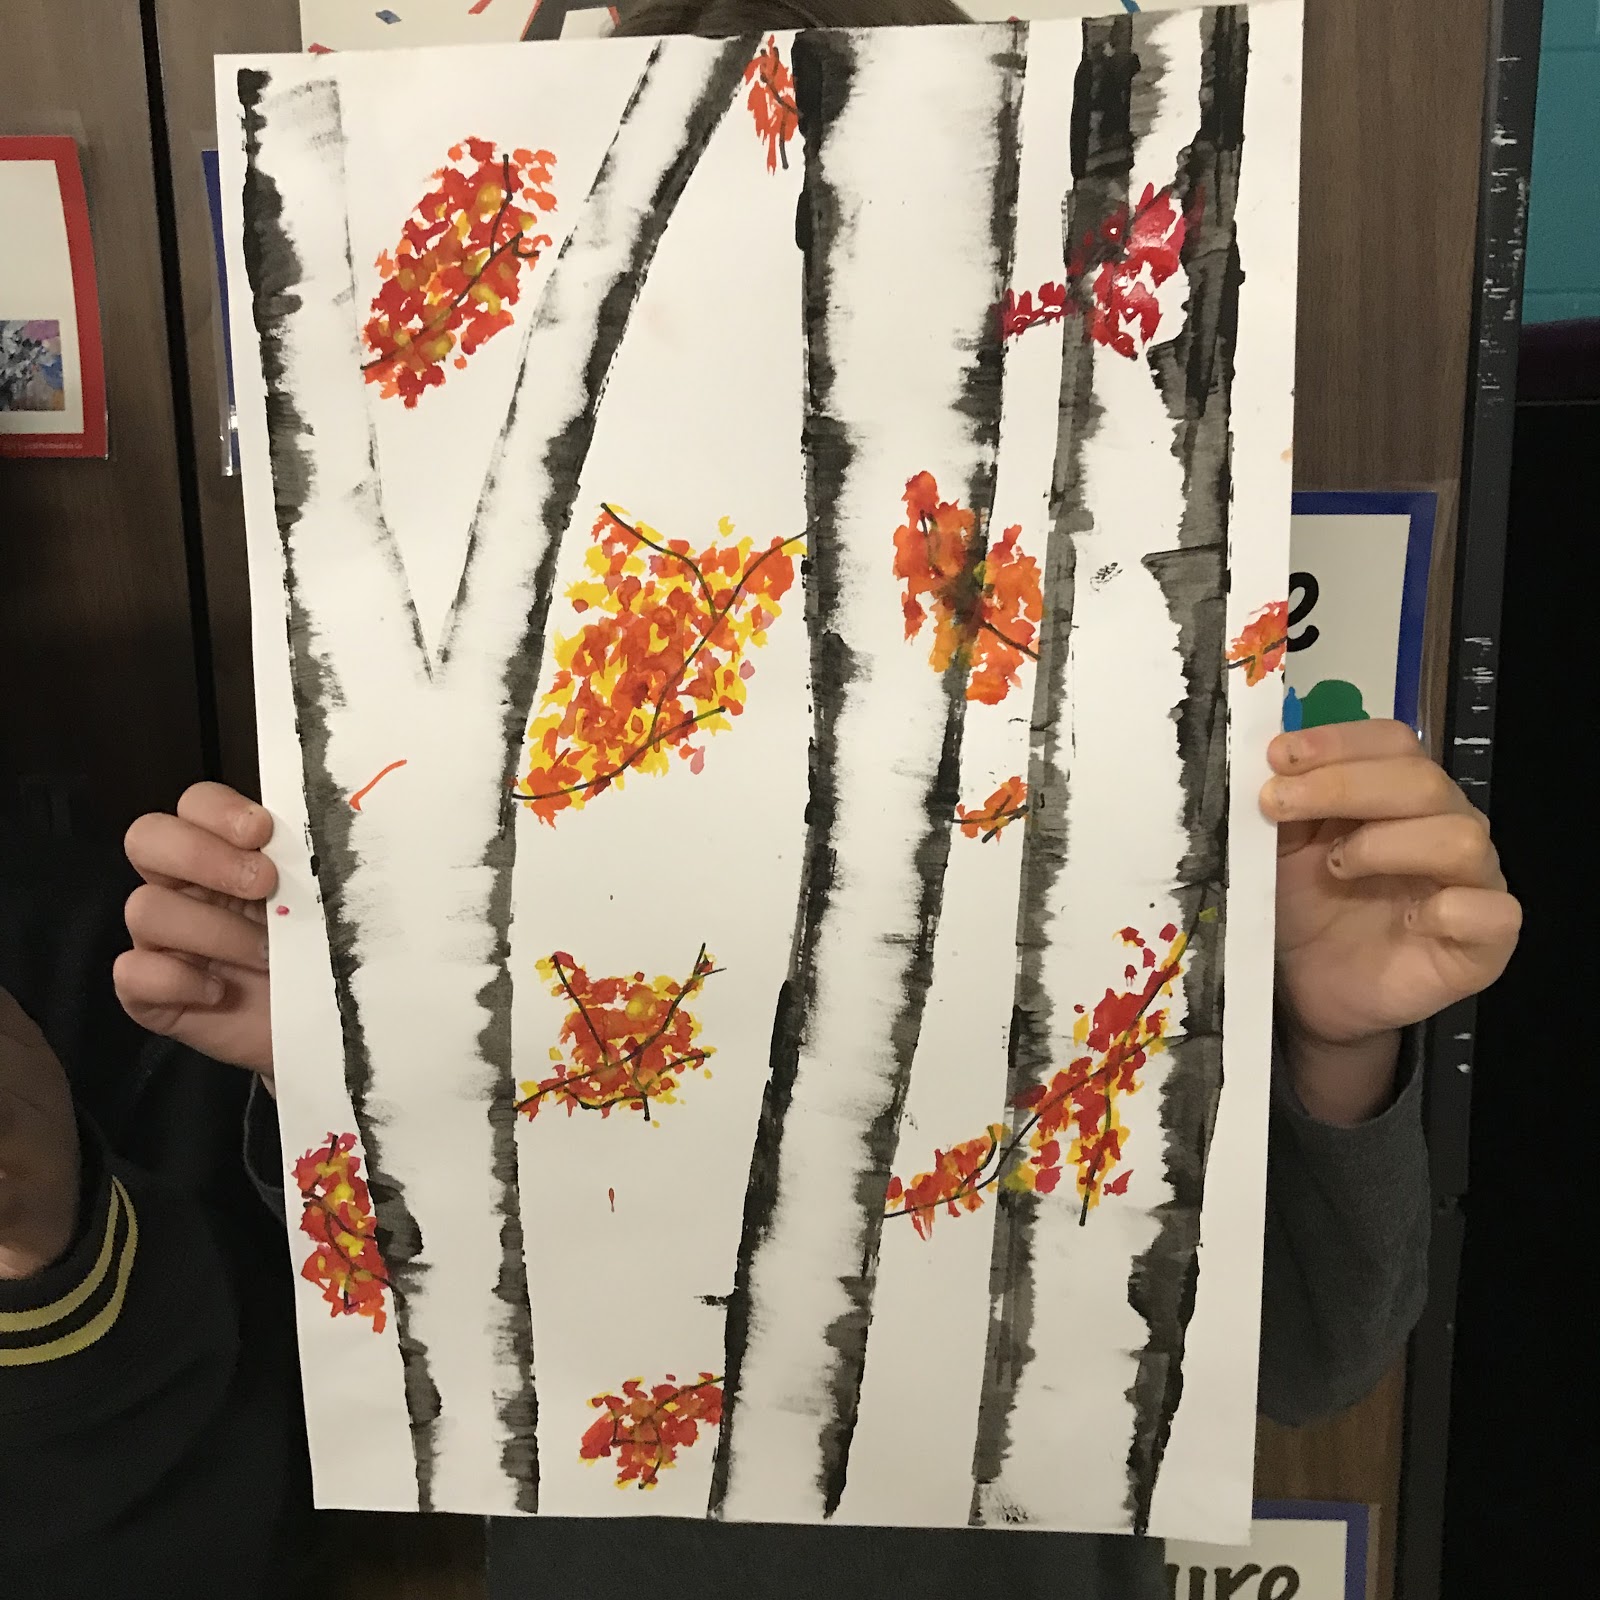
Day 1: We will look at photos of birch trees online, and talk about the texture of the bark and really examine what these birch trees really look like. I'll demonstrate how to drag the cardboard and black paint across the paper to create this unique bark texture. The students will get a piece of practice paper first, will practice creating these trees until they get the hang of it, and then they'll get their final piece of paper to create their painting on.
Here's a picture of how to get started. If you're right handed, swipe your cardboard to the right. Vice versa if you're left handed. I create one side, and then flip my paper around to create the other side of the tree. This makes things so much easier!


Here's what the students should finish on Day 1

Day 2: We'll add branches with Sharpies, and paint leaves and grass with our tempera cakes!
Here's what they have finished so far!


These guys and girls are off to a great start!!
You can also change the background up to accommodate for any season. Here's a different arrangement, with snow and sunset colors in the background!

I especially love the winter sunset scene-- adding the light pastel back ground is a nice touch and a different winter project with softer colors than the norm
ReplyDeleteThank you! I thought it'd be a nice way to transition this project into winter, and I think I like it better myself! Thanks for stopping by! Have a great day!
DeleteHow did you do the background for the winter trees? Did you paste the trees on the already painted background? Amazing project!
DeleteHi! Thanks so much!
DeleteWe actually scraped/painted the trees on to the paper first. I got them to practice first, and then we had a final. We waited for them to dry, and then did a kind of wet on wet thing with tempera cakes! Watercolor would work as well! Thanks for stopping by! Hope that helped! If it didn't, let me know!
Amazing!
ReplyDeleteWonderful idea! :)
ReplyDeleteWould it be easier to do the soft pastel background first? Let the watercolors dry thoroughly and then apply the trees? Thanks!
ReplyDeleteThis comment has been removed by the author.
DeleteIf you did your trees on a separate sheet of paper, cut them out, and glued them on, you could do it that way. I think one would be using double the amount of paper necessary that way though. If you just scraped the cardboard directly onto the painted background, the trees wouldn't be white anymore, and look odd. When you say soft pastel though, i get an idea...If you didn't want to paint the background for fear of getting it on your white trees, you could use chalk pastel to add color to the sky. Just a thought, hope it helps :)
DeleteI love this idea. I've always done the background first and used newspaper for the trees. Or I've used tape to make the trees, FYI, taking the tape off is so hard unless you use a hair blower, but even then it still takes the paper sometimes. But I love your technique, for painting on the trees, especially when you said to turn the paper over to do the other side. Duh, seems so simple, but I didn't think of that. Thanks so much for sharing.
Delete