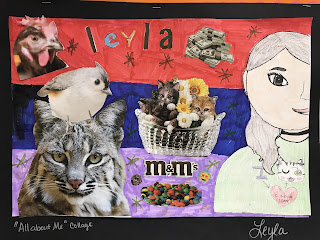
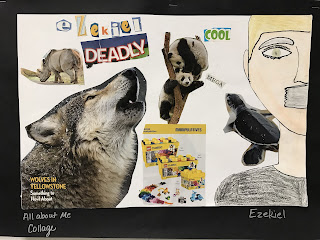
This project is actually from the beginning of the year, but we just now finished it at the end, right before night of the arts! It was definitely a learning experience, and evolved from my first vision of what the project was going to look like. I wanted to do something like I did in my freshman Art I class, with Mrs. Elliott in high school (about 21 years ago!). In Mrs. Elliott's class, we did a collage with magazine clippings, of things that represented us, and we colored the background with markers or colored pencils.
Here's how we create ours!
Materials:
Markers
Magazines
Glue sticks
Crayola Twistables
9x12' paper for the portrait
12x 13" paper for the background
First thing I learned was, start with smaller paper! The teacher I student taught for, reminded me to do this with my older kids, and it's finally sunk in. Instead of a 12x18 piece of paper, we trimmed it down so there's less to color!
Day 1: We started our collage. (When I do this project again, I'll do the portrait first!) I told them I wanted them to assemble their name with large letters they find in the magazines. Then, I wanted them to cut out images and other words that represent them.
Day 2: We did half of our face. A different spin on the traditional self portrait I do with them each year. This time, we don't have to get both sides exactly even! That's really frustrating for them at this age, btw, is trying to get both sides to match exactly. Even though, I tell them it doesn't have to! I got the awesome idea from The Lost Sock, by Tabitha Morgan. She has a great tutorial on how to draw it!
Day 3: Glue face to collage, and color! We used markers for the background of the collage and colored pencils for the face.
This might take some people 4 art times to finish! (I see them once a week for 45 minutes)
Here are some of my finished examples that they chose to be displayed for our annual Spring art show.


Love this!
ReplyDeletethanks so much!
ReplyDeleteThis comment has been removed by a blog administrator.
ReplyDelete