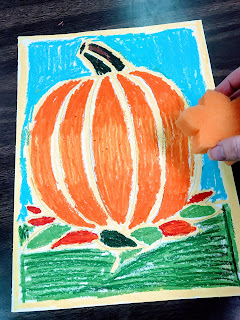
This week, 3rd grade is trying something new! I found this on A Faithful Attempt blog, and wanted to try it with our students!
Here's how we created ours!
90 lb paper (got to have thick paper!)
Day 1: We looked at the example on the Faithful Attempt blog, and looked at actual pumpkins. We observed the curved lines and different values (lights or darks) on the pumpkins. We observed they're not perfectly round, and the stems aren't perfect little rectangles. We also looked up what batik was, and the process that goes into that art form. Here's a neat site, Dharma Trading Co., has examples of what batik is!
Then, we got to work! We drew our pumpkins together, step-by-step. Then, we traced our drawings with yellow chalk. I reminded them to draw big, and make thick bold lines with their chalk. This is going to be our dark outlines when we finish.
Then, I wiped the chalk off with a damp sponge.
Day 2: Add black ink!
I placed mine in the sink, and painted the whole thing with India Ink
Here's a short video showing me painting my picture.
Here's what happened when I washed it off
Here's a few pictures of the finished product.
Stay tuned for some awesome 3rd grade art!


No comments:
Post a Comment